Test Flight - Avila Beach, 2/28/04
Updated: 2/29/04


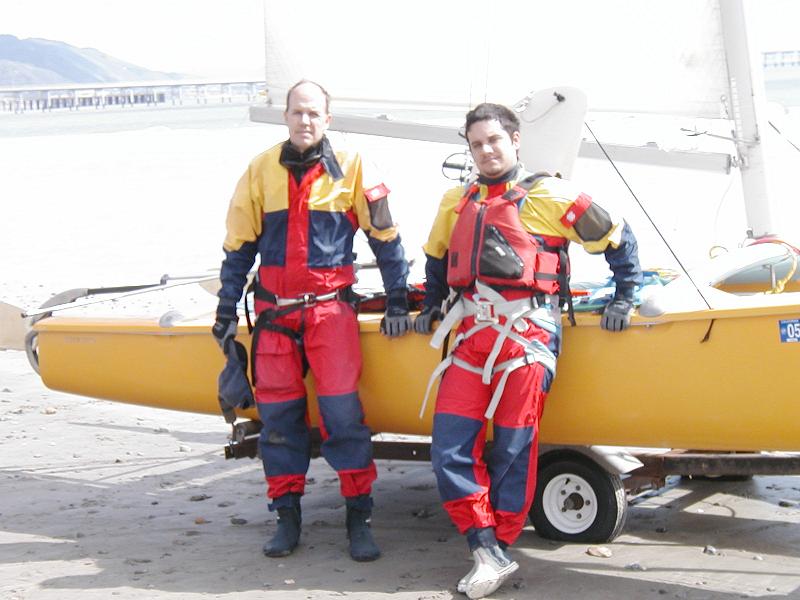
Bill Mattson (Left) and Tom Mattson (Right)
Sometimes you get so involved in your boat, you can't even put your gear on
correctly. Note my one leg is not in the trap harness.
Test Results
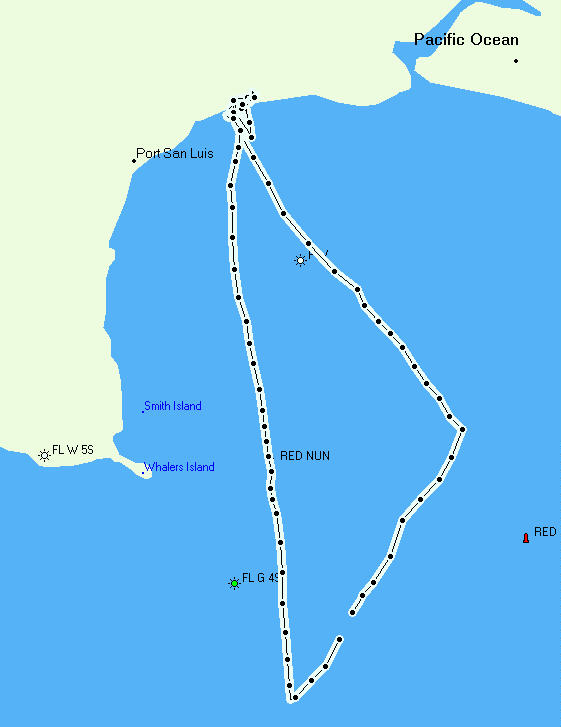
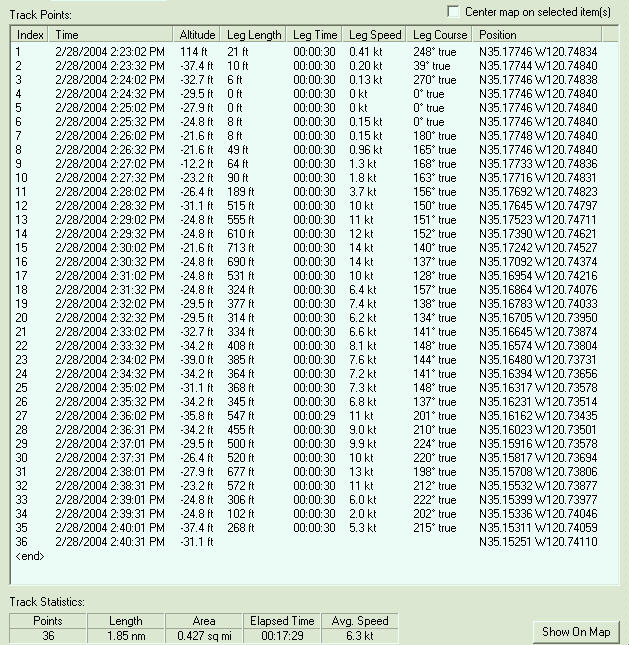
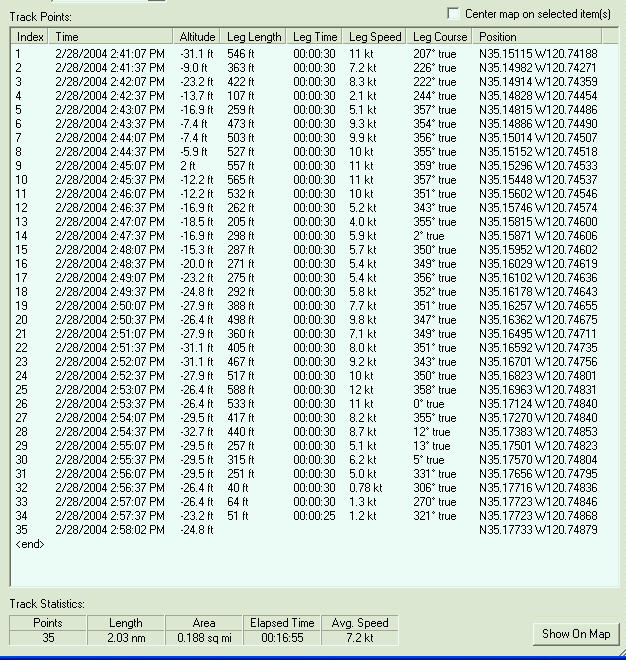
All information below was compiled from recorded GPS data, and weather data provided by
NOAA Weather Buoy #46062 (Pt. San Luis).
I, my son Tom, and friend Gary, all boarded the boat and left the somewhat sheltered area of Avila Beach at 1:29pm. About 4 minutes later, we discovered that genius me had installed the rudders on backwards. Both were severely "toed in" and cavitating. We turned around to correct the problem. As we entered the surf line, the forces of the rudder installation, rudder position (up), boat speed, and surge all combined to snap the port rudder completely in two just below the casting.
In another impressive display of resourcefullness, Gary produced a used Hobie 18 rudder blade from the trunk of his car. The holes had been filled with epoxy, as Gary planned to sell the rudder. He just found a buyer! We both took it down the local boat yard and found a couple sailors working on their boats who graciously let us borrow a drill and drill bit. Using the broken piece of rudder as a guide, we re-drilled Gary's rudder, then returned to the beach to install it.
We shoved off a 2nd time at 2:26pm. Noting the white capping seas out past the breakwall, I headed downwind, away from the sheltering point and breakwall, as to make the transisition to the open sea more gradual. Small Craft Advisories were in effect. These were going to be sufficient conditions to test the integrity of the boat. During some tests of furling and unfurling the jib, the furling line snapped. This was the original line and will be replace with a new one.
At 2:36pm, we were getting into the rough stuff, and I tacked the boat to weather and started testing her seaworthiness. Winds were 18 kts, gusting to 20. The seas were 7.5 foot swells and 5.2 foot wind waves, with the significant wave height at 9.2 feet.
With the three of us on board, we were getting pretty wet. Since Tom and I plan on cruising this boat to the islands, Gary's weight provided a good test as it would be close to the combined weight of provisions, motor, and other equipment. The boat was performing well. The crossbar to hull attachments were completely solid, save for some barely perceptable movement at the starboard front crossbar attachment. The hull allignment was surprisingly stable in the rough seas. Tom went out on the trapeze.
At 2:39, a large wave hit us, completely submering Tom and taking him off the boat. He managed to stay on the trapeze, and was dangling around by the stern. During this event, the small rope lock on the trapeze line exploded from the force and was gone.
At some point, Gary noticed we were losing luff tension in the jib due to a broken jib halyard. We continued on, but were soon losing so much jib trim we decided to turn back at 2:43pm.
With Gary now at the helm, he looked up and noticed that one of the batten caps (at the main luff) was broken, and the batten was starting to poke through the sail. At this point, we decided to limp the boat in without pushing it very much.
We landed at 2:56pm. It was a very short sail, but completely satisfied my expectations for the day. We proved the integrity of the boat, and exposed weaknesses that will be easily corrected. Top speed for the day was 14 kts, and the boat was never in optimal trim.
GPS Data


Repair Checklist
Replace jib halyard
Replace furler line
Replace mast bearing
Replace jib sheet with smaller diameter line
Replace stainless lower rudder rake adjusters with OEM plastic ones
Either install new OEM rudder casting bushings, or fabricate better ones
Repair jib luff zipper
Replace all batten cap rivets with stainless screws
Patch sail at point of batten cap failure, if needed
Check and re-drill rudder to exactly match the other.
Drill out holes at forestay/chainplate attachment so they allign better.
Find leak in hulls, with emphasis on port hull, and correct.
Check and re-tighten front crossbeam attachment on starboard side.
Lower the cleating angle on the main sheet cam cleat.
Back to title page...


